Gel nail stickers can look salon-fresh in under 30 minutes, but the final result usually comes down to prep, placement, and how well you seal the edges. If you want to know how to apply gel nail stickers so they last without lifting, peeling, or catching hair on day two, the process is simple but not something to rush.
These stickers are popular for a reason. They give you the glossy look of a gel manicure without dealing with bottles of polish, drying time, or the mess that comes with touch-ups. They are also a smart buy if you want quick nail art at home without paying salon prices every week. The trick is getting a clean fit and curing them properly.
Start with completely clean nails. That sounds obvious, but any leftover oil, lotion, dust, or old polish can shorten wear time fast. Wash your hands, dry them well, and wipe each nail with alcohol or a nail cleanser if you have one. If your nails tend to be oily, this step matters even more.
Next, shape your nails and lightly push back your cuticles. You do not need aggressive prep. A gentle push is enough to create more surface area and help the sticker sit flat. If there is dry skin sitting on the nail plate, remove it carefully, because gel nail stickers do not bond well over uneven spots.
A light buff can help, but only if your nails are very smooth or naturally slick. You are not trying to thin the nail. Just take away some surface shine so the adhesive grips better. Then wipe away any dust before moving on.
Now match each sticker to each nail before peeling anything off. This is where a lot of people make mistakes. If the sticker is too wide, it can touch skin or cuticle and start lifting early. If it is slightly too narrow, that is usually better than too wide. Choose the size that fits the nail plate without overlapping onto the skin.
When you are ready, peel one sticker off and place it near the cuticle line, leaving a tiny gap instead of pressing it directly into the skin. Lower it from cuticle to tip and smooth it down slowly. Press from the center outward to push out air and prevent wrinkles. If the sticker shifts, fix it right away before pressing firmly.
Once the sticker is in place, smooth the sides carefully. This is the part that helps it look more natural and last longer. Use a cuticle stick, silicone tool, or your fingertip to press the material around the curve of the nail. Pay extra attention to the sidewalls and the free edge.
Trim or fold the extra length at the tip, depending on the type you are using. Some gel nail stickers can be gently folded downward and filed off with a downward motion. Others are easier to trim first and then refine with a nail file. Filing too aggressively can tug the sticker loose, so use a light hand.
If your gel nail stickers require curing, place your hand under a UV or LED lamp for the brand’s recommended time. In many cases, one to two rounds of curing are enough. If they still feel soft, give them a little more time. Under-curing can leave the nails more likely to dent or peel, while over-curing is usually less of a problem than poor prep or bad sizing.
After curing, press all edges again. This final seal is easy to skip, but it helps a lot. If you want extra shine or extra hold, you can apply a gel top coat if the product is designed to work with one. Not every sticker needs it, so check the product details before adding another layer.
If you have ever applied nail wraps or stickers and had them lift within 48 hours, the problem was probably not the sticker itself. It was usually hand cream, cuticle oil, water exposure before application, or a fit that was too large. Gel nail stickers stick best to dry, clean nails that have not been soaked.
That means timing matters. Do not apply them right after a shower, bath, dishwashing session, or cuticle oil treatment. Nails absorb water, expand slightly, and then contract as they dry. That movement can weaken the bond early. For the best hold, apply them when your nails are dry and your hands are room temperature.
It also helps to avoid touching your hair, face, or skin after cleansing your nails. Natural oils transfer fast. If you are doing a full set, prep one hand, apply, then prep the other if needed.
The most common issue is choosing the wrong size. Bigger does not mean better. If the sticker touches skin, lint and water can sneak in at the edges, and lifting starts there. A slightly smaller fit usually looks cleaner and lasts longer.
The second issue is not pressing the edges firmly enough. The middle may look smooth, but the sides and tip take the most wear. If those areas are not sealed well, the manicure can start peeling after normal daily tasks like typing, opening packages, or washing your hands.
Another problem is trimming too much before curing. Some gel nail stickers shrink a little as they set, so if you cut them too short right away, you may end up with a gap at the tip. Leaving a small amount to file down after placement usually gives a neater finish.
People also rush the curing step. If your lamp is weak, old, or not compatible with the sticker material, the result may not set the way it should. If your manicure keeps denting or shifting, the lamp may be the issue rather than your technique.
With solid prep and careful application, gel nail stickers can last around 7 to 14 days, sometimes longer. Wear time depends on your nail condition, how often your hands are in water, and how rough you are on your nails. If you use your nails as tools, expect shorter wear.
Nail shape can matter too. Short to medium nails often hold stickers better than very long nails because there is less leverage at the tip. If your nails peel, bend, or break easily, using a top coat or choosing thicker gel stickers may give you better results.
If one nail lifts early, you may be able to press it back down if the edge is still clean. But if lint or dust has already gotten under it, replacement usually looks better than trying to save it.
Removal should be slow. Peeling them off dry can take layers of your natural nail with them, even if the sticker feels loose. Start by softening the adhesive with cuticle oil, remover, or warm hands. Then use a wooden stick to gently lift an edge.
Work a little oil underneath as you go. If you feel resistance, stop and add more. The sticker should ease away rather than tear off. After removal, buff lightly only if needed and apply cuticle oil or hand cream.
If your nails feel dry afterward, give them a short break before your next set. That does not mean gel nail stickers are bad for nails. It usually means the removal was too rough or the nails need moisture.
If you want your manicure to look more expensive, focus on fit and finish instead of speed. A clean cuticle line, smooth sides, and a properly filed tip make a bigger difference than a complicated pattern. Even simple solid colors can look polished if the edges are neat.
Good lighting helps more than most people think. Applying stickers in dim light makes it harder to see whether they are touching skin or sitting crooked. Take a few extra minutes and check every nail from different angles before curing.
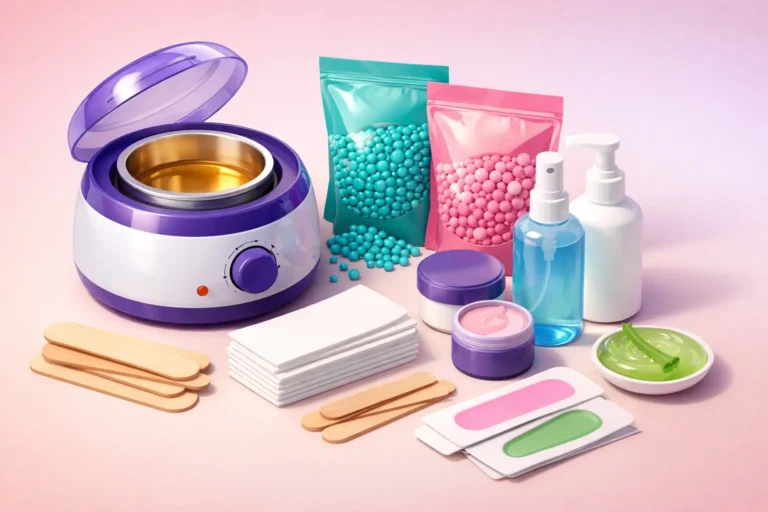
It also pays to keep a few basic tools on hand, like a nail file, cuticle pusher, alcohol wipes, and a curing lamp if your sticker type needs one. These are low-cost essentials that make at-home manicures easier and more consistent. If you are shopping for nail care tools, gel wraps, or manicure accessories, a broad-value store like https://health-beauty-care.com can make it easier to build a full kit in one order.
Learning how to apply gel nail stickers gets easier fast. After one or two sets, you will know which sizes fit you best, how much pressure to use, and how long your nails need under the lamp. A little patience at the start usually saves you from chips, lifting, and redoing nails later.


Leave a comment
You must be logged in to post a comment.