If your manicure looks flat after the top coat goes on, foil is usually the fix. A few pressed pieces can turn a basic nude, black, or sheer pink set into something that looks custom, glossy, and far more expensive than the cost of the supplies.
That is why nail art foil designs keep showing up across home manicure kits and salon looks alike. Foil gives instant texture, shine, and contrast without requiring advanced freehand skill. For shoppers who want strong results without paying premium salon prices, it is one of the easiest nail art upgrades to add to a cart.
Foil has range. It can look soft and minimal when used in tiny gold flakes over a milky base, or dramatic when layered in mirror silver over black gel. It also works across short nails, long acrylics, almond shapes, square tips, and natural nails.
The biggest advantage is speed. You do not need to paint every detail by hand to get a detailed finish. With the right foil glue or transfer gel, the pattern is already there. You press, lift, and seal. That makes foil a practical choice for beginners, but it is also popular with experienced nail artists because it adds dimension fast.
There is a trade-off, though. Foil can be less forgiving than stickers if your base is still too wet, too dry, or uneven. Prep matters more than people expect. If the adhesive layer is not ready, the transfer will come out patchy. Some people love that broken, abstract effect. If you want a cleaner result, timing is everything.
Some foil looks stay popular because they are easy to wear. Others trend because they photograph well and catch light from every angle. The best choice depends on whether you want everyday nails, event nails, or something bold enough to stand out immediately.
This is the easiest entry point. A soft base color with torn gold foil pieces gives a polished look without being loud. It works for weddings, office wear, weekend looks, and short natural nails. If you are building a low-cost nail kit, this style gives you the most use because it goes with almost everything.
If you want contrast, this combination delivers it fast. Black polish creates a strong background, and silver foil picks up every bit of shine. It feels modern and sharp, especially on almond or coffin shapes. The downside is that mistakes show more clearly on black, so cleaner prep and careful top coating matter.
Marble-inspired foil designs mix white, gray, gold, and translucent layers for a stone-like effect. These are a good fit if you want detail without a crowded look. One or two accent nails are often enough. Full marble sets can look great too, but they usually need a more controlled hand and a little patience.
For shoppers who like trends but still want wearable nails, holographic foil on the tips is a strong middle ground. It gives movement and color shift without covering the whole nail. This style works especially well over clear, sheer, or pale bases.
This look is popular because it feels softer than classic gold but still catches light. The cracked transfer effect looks intentional, not too perfect, which helps if you are still learning. It pairs well with mauve, beige, taupe, and dusty pink shades.
Gold, silver, and bronze in one set can look surprisingly clean when the base color is simple. This design is useful if you wear mixed jewelry and do not want your manicure locked into one metal tone. The key is restraint. Too much foil on every nail can shift from stylish to messy very quickly.
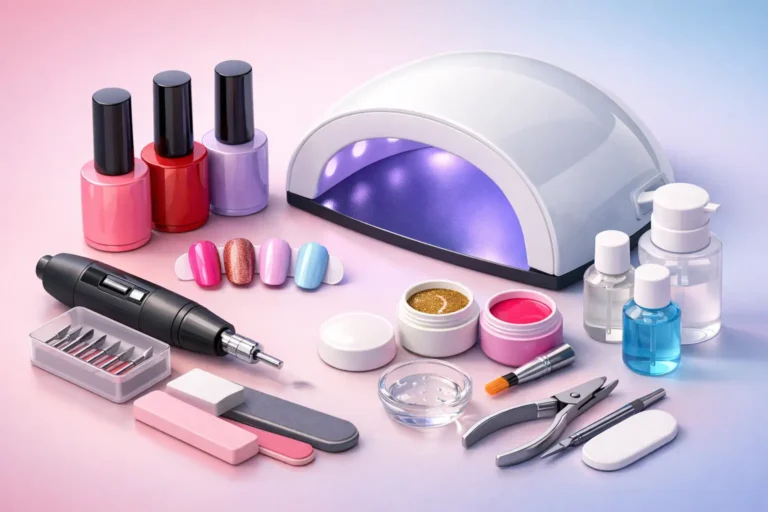
A good foil manicure does not require a huge budget, but the right tools make a difference. Most at-home shoppers do well with nail foil sheets, foil glue or transfer gel, a base coat, the color polish or gel of choice, a silicone tool or fingertip press, and a reliable top coat.
If you use regular polish, foil glue is often the easier route. If you use gel, transfer gel can give more control and a cleaner pickup. Neither option is automatically better for everyone. It depends on your routine, the products you already own, and whether you want quick occasional nail art or more frequent sets.
The top coat matters more than people think. Some foils wrinkle or lose shine under the wrong formula. A non-smearing top coat or a gentler floating application can help keep the finish crisp. If you drag the brush too hard, you can blur the foil and ruin the pattern you just placed.
Start with clean nails and a smooth base. Any ridges, peeling edges, or leftover oil can interfere with transfer. After your base color is fully set, apply foil glue or transfer gel only where you want the design. Full coverage is not always necessary. Partial placement often looks more modern and uses less product.
Wait for the adhesive to reach the right stage. This is where many beginners go wrong. If it is too wet, the foil slides. If it is too dry, almost nothing transfers. Press the foil firmly with the shiny side facing up, then lift in one steady motion. If you want a broken texture, press lightly in different spots instead of trying to cover the whole nail at once.
Seal with top coat once the foil is fully in place. Cap the edges so the design lasts longer. If your nails chip easily, a second thin layer can help, especially on the free edge.
Short nails usually look best with lighter placement. Corner accents, scattered flakes, and foil tips keep the design balanced. Full heavy foil can make a short nail look crowded unless the base color is very simple.
Longer nails give you more room for layered effects like marble, flames, abstract patches, and mixed metallic patterns. Coffin and almond shapes tend to show foil movement especially well because the longer surface gives the pattern space to stretch.
Square nails work best with structured foil placement such as framed edges or diagonal sections. Rounded nails are better for softer cracked-metal and scattered-flake looks. There is no hard rule here, but matching the foil pattern to the nail shape usually gives a cleaner finished result.
If you are buying for value, variety matters. A multipack with several metallics, holographic finishes, and printed patterns usually makes more sense than buying one single roll at a time. That gives you room to test different styles without spending more on separate orders.
It also helps to think in combinations. A foil set is more useful when you already have neutral gel polish, black and white basics, top coat, and a transfer product that works with your routine. Buying random foil patterns without the prep products often leads to disappointing results, not because the foil is bad, but because the system is incomplete.
For shoppers who want affordable beauty tools and broad selection in one place, stores like Health Beauty Care make the most sense when you are building out a full at-home kit instead of buying a single trend item. That is usually the better value move.
Patchy transfer does not always mean failure. Sometimes it creates the exact distressed metallic look people want. But if you were aiming for cleaner coverage, the fix is usually simple. Smooth the base, check adhesive timing, and press more evenly.
If the foil dulls after top coat, try a lighter touch and avoid overworking the brush. If the design lifts at the edges, cap the nail and make sure each layer is properly cured or dried before moving on. And if the final look feels too busy, pair foil with quieter base colors next time. Beige, soft pink, milky white, taupe, and black do most of the work.
Nail foil is one of the few nail art options that can look high-impact without asking for salon-level skill or a big spend. Start with one or two easy combinations, get the timing right, and your next set can look like you paid a lot more than you did.


Leave a comment