A press-on set can look salon-fresh in minutes, but the difference between nails that last two days and nails that last over a week usually comes down to prep. If you want to know how to apply press on nails so they look neat, feel secure, and stay put, the process is simple – but skipping small steps can cost you wear time.
Press-on nails are popular for a reason. They are fast, affordable, and easy to change when you want a different shape, color, or design. They also make sense for shoppers who want a polished look at home without booking an appointment or paying salon prices. The good news is that getting a better result does not require pro-level skill. It requires a clean nail surface, the right size, and a little patience.
Before you open the glue, set up your nails properly. Press-ons stick best to nails that are clean, dry, and lightly prepped. If your hands are oily from lotion, cuticle cream, or even natural skin oils, the adhesive has a harder time gripping.
Start by washing your hands with soap and water and drying them well. If you have old polish, leftover glue, or any residue on your nails, remove it fully. Then trim and file your natural nails so they are short and even. A shorter natural nail usually gives a smoother fit under the press-on and helps prevent lifting at the edges.
Next, gently push back your cuticles. This matters more than many people realize. If the press-on sits on top of skin instead of the nail plate, it is more likely to lift early. You do not need to cut your cuticles unless you already do that safely as part of your routine. Pushing them back carefully is enough for most people.
After that, lightly buff the surface of each natural nail. The goal is not to thin the nail. You only want to remove shine so the adhesive has a better surface to hold onto. Once you finish buffing, wipe away dust and clean each nail with alcohol or a nail dehydrator. This step helps remove oil and leaves the nail ready for glue or adhesive tabs.
A good fit changes everything. If a press-on nail is too small, it can pinch and pop off. If it is too large, it can overlap onto the skin and start lifting around the sides.
Lay out your press-on set before application and match each nail to your natural nail width. The best size should fit sidewall to sidewall without forcing it. If you are between sizes, going slightly smaller usually looks better than going too large, but it depends on the shape of your natural nail. Some people lightly file the sides of a press-on for a more custom fit.
Set the sizes in order before you start gluing. That saves time and helps you avoid mistakes once the adhesive is on. If your set includes 24 or more nails, use that extra variety to your advantage. A close match will always wear better than a rushed guess.
This part depends on how long you want to wear the set. Nail glue usually gives the strongest hold and is the better choice if you want your press-ons to last through daily tasks, hand washing, and several days of wear. Adhesive tabs are quicker, less messy, and easier to remove, which makes them better for short-term wear, events, or anyone who likes changing nails often.
Glue is the stronger option, but it also requires more care during removal. Tabs are gentler, but they may not hold as long if your hands are in water a lot or if your nail beds are naturally oily. Neither option is wrong. It comes down to wear time, convenience, and how often you like to switch styles.
Once your nails are prepped and sized, apply one nail at a time. If you are using glue, place a small amount on your natural nail and a small amount inside the press-on. You do not need a huge drop. Too much glue can spill out around the edges and create a messy finish.
Line up the press-on near the cuticle, but do not place it directly on the skin. Start at a slight angle, then press it down firmly from the cuticle area toward the tip. Hold it in place for 20 to 30 seconds. This helps reduce air bubbles and gives the adhesive time to bond.
Repeat on each nail, checking placement as you go. It is usually easier to work hand by hand instead of jumping around. If you are using adhesive tabs, press the tab firmly onto the natural nail first, remove the backing, then apply the press-on with the same angle-and-press method.
Try not to rush the thumbs. They often need a little extra pressure because they get the most use during daily tasks. A secure thumb application can make the whole set feel more reliable.
Most wear problems come from a few familiar issues. The first is applying nails to a surface that still has oil, lotion, or moisture on it. Even a little leftover product can weaken the bond.
The second is using the wrong size. Side lifting often starts because the nail is too wide or not sitting flat against the natural nail. The third is using too much glue or too little. Excess glue can create gaps, while too little may not cover enough surface area for a strong hold.
Water is another factor. If possible, avoid showering, washing dishes, or soaking your hands right after application. Giving the adhesive time to set can help the nails last longer. Applying press-ons right before bed often works well because your hands stay relatively dry and still for several hours.
If you want longer wear, treat the first day like setup time. Avoid long exposure to water, do not use your nails as tools, and be careful with tasks that put pressure on the tips.
Wearing gloves while cleaning or washing dishes helps. So does using the pads of your fingers instead of the nail edge when opening cans, peeling labels, or typing aggressively. A little care goes a long way.
If a corner starts to lift, do not rip the nail off. Add a tiny amount of glue under the lifted area, press it back down, and hold it in place. Small repairs can extend the life of a set and keep the manicure looking fresh.
Some people also apply a layer of top coat over the press-ons for added shine or a more finished look. That can help, especially on lower-cost sets, but it depends on the material and finish. Matte nails, for example, may lose their effect if you add a glossy top coat.
Removal matters just as much as application. Pulling press-ons off by force can leave your natural nails weak, rough, or peeled.
If you used adhesive tabs, warm water and a little oil may help loosen them. If you used glue, soak your nails in warm soapy water and apply cuticle oil around the edges to encourage lifting. Some people use acetone for faster removal, especially with stubborn glue, but that can be drying. If you choose acetone, follow with hand cream and cuticle oil.
Work slowly with a wooden stick or cuticle pusher and lift from the sides once the adhesive begins to soften. If a nail is not ready, soak longer. Forcing it usually leads to damage.
After removal, buff off leftover glue gently and moisturize your nails and cuticles. If you wear press-ons often, giving your natural nails a short break between sets can help keep them in better shape.
For many shoppers, yes. Press-ons offer strong value because they cost less than a salon visit, take less time, and let you change your look whenever you want. They are especially useful if you like trying new nail shapes, colors, or designs without a big commitment.
The trade-off is that results depend on prep and daily habits. A carefully applied set with glue can last surprisingly well, while a rushed application may not make it through the weekend. That is why choosing the right tools and taking a few extra minutes upfront makes such a difference.
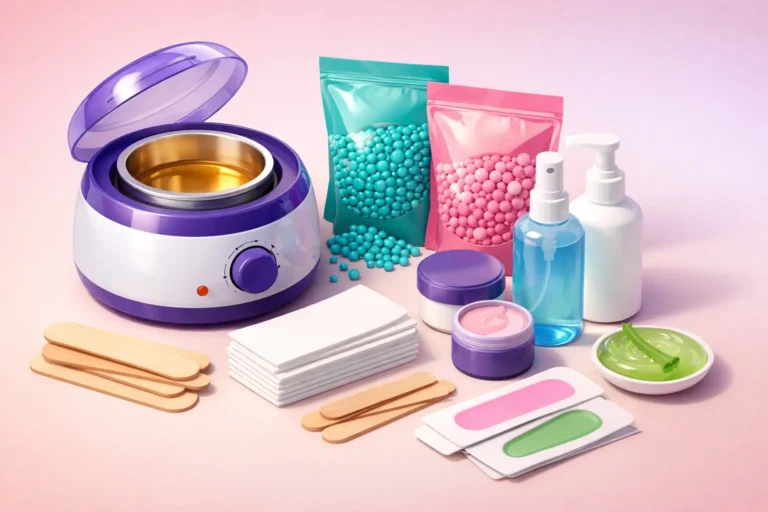
If you are building an at-home nail routine, a good press-on set, nail glue, buffer, file, and cuticle tool are smart basics to keep on hand. Stores like Health Beauty Care make that easy with a wide range of affordable nail care options, so you can stock up without paying specialty-store prices.
A better manicure usually starts before the nail goes on. Take your time, fit each nail properly, and let the adhesive do its job. When you do that, press-ons stop feeling like a quick fix and start looking like a smart, budget-friendly part of your beauty routine.


Leave a comment
You must be logged in to post a comment.